 .
.This new feature allows you to transform your ordinary file label creation. This new feature will allow you to add a filter based on an action item code.
1. Go to the Main Menu and select .
2. Then select  .
.
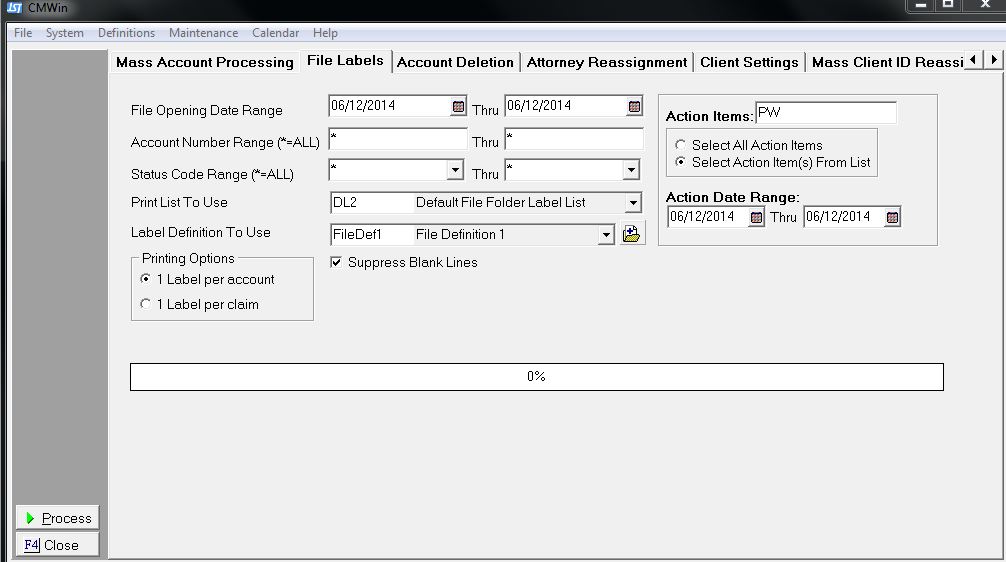
3. The following screen will pull up:

4. Enter your “Opening Date Range” by clicking on the button; the date format will be MM/DD/YYYY.
5. Enter your “Account Number Range”, or if you want all account numbers that were opened during the date specified above enter an asterisk (*) and it will select ALL Account Numbers for you.
6. Enter your “Status Code Range” by using the button, or by entering an asterisk (*) instead, and All Status Codes will be used.
7. Select your “Print List” by using the button.
8. Select your “Label Definition” by using the button.
9. If you want to" Suppress Blank Lines" from printing. Check the box below:
![]()
10. Select the appropriate radio button for your label. If you select “Per Account” only one label will print. If you select, “Per Claim” a label will print for each claim under that account.
The following feature was added to give more filter options when printing new File Folder labels.
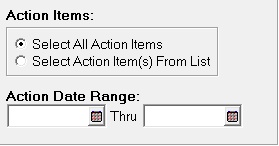
1. Select the appropriate radio button for your “Action Item” selection. If you select ALL then all Action Items will be eligible for generating your file labels. If you “Select From List”
The following screen will pull up:
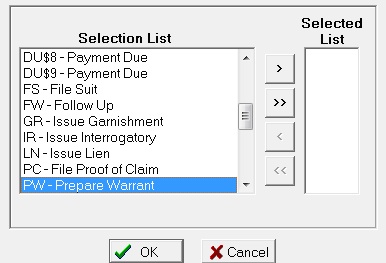
2. Highlight your Action Items and then click the  button to move your Actions to the "Selected List" column. If you use the
  option, it will move all actions to the "Selected List" column. In that situation, it is better to use the radio button for ALL actions.
3. You should see your Action selection in the “Selected List”.
4. Then click the  button. If you need to start over, click the
  button.
5. After clicking OK, enter your date filter by clicking the  button. The date format is MM/DD/YYYY.

6. This is a completed file folder label form. Before moving forward verify your selections.
7. Click the  button.
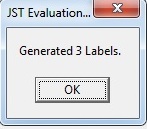
8. The next pop-up will let you know how many labels were sent to your print list.
9. Then click the  button.
10. Then click the  button. It will return you to the Main Menu.
11. Then click on the  button, and highlight the appropriate print list.
12. Select the  button.
13. After the file labels prints, click the  button and you will be returned to the main menu.